
How to upgrade from Windows 10 32-bit to 64-bit?
Upgrading Windows 10 from a 32-bit version to a 64-bit version brings many benefits such as maximizing hardware utilization, improving performance, and accessing more software. However, this process requires certain precautions and operations. This article will guide you in detail on how to safely and effectively upgrade Windows 10 from 32-bit to 64-bit.
What do you need to do before upgrading from Windows 10 32-bit to 64-bit?
1. Check if Windows 10 64-bit is compatible with your computer?
The 64-bit version of Windows can only be installed on computers with compatible hardware. Therefore, if you want to switch from Windows 10 32-bit to 64-bit, the first thing you need to do is check if the 64-bit version is compatible with your computer?
Press the Windows + I keys to open the Settings menu > click System > click About.
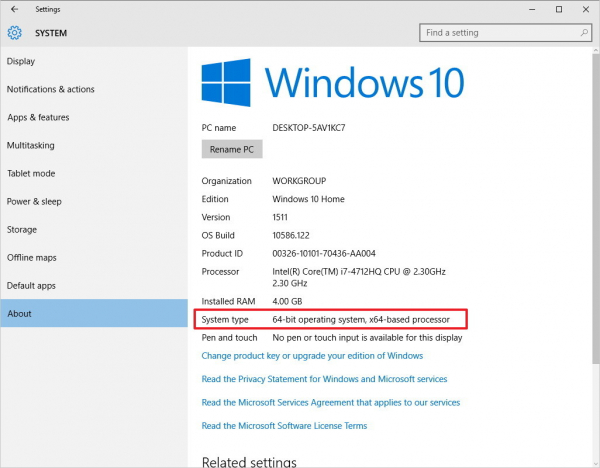
In the System Type section, if you see the information: 32-bit operating system, x64-based processor, it means your Windows 10 computer is running the 32-bit version, and the chip supports 64bit.
If the information is 32-bit operating system, x86-based processor, it means your Windows 10 computer does not support the 64-bit version.
You can also open Windows Explorer > right-click on This PC, select Properties, you can also check the System Type of the system.
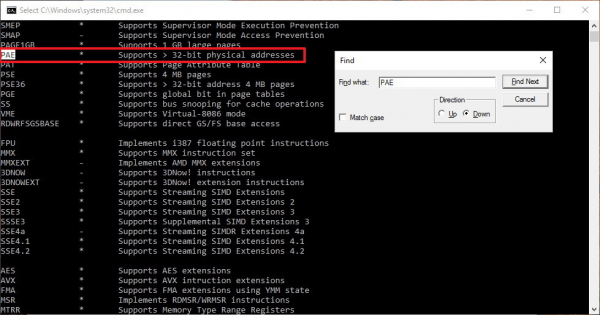
Additionally, some computers running Windows 10 require the processor to ensure some features. According to Microsoft's support page, on the Windows 8.x operating system and later versions, the operating system requires 3 features: Physical Address Extension (PAE), No-eXecute (NX), and Streaming SIMD Extensions 2 (SSE2). Moreover, Windows 10 (64-bit) also requires the CMPXCHG16b (CX16) feature to be present in the processor.
The Windows Setup wizard always checks the hardware compatibility before starting the installation. If this feature is not supported, you cannot install Windows 10.
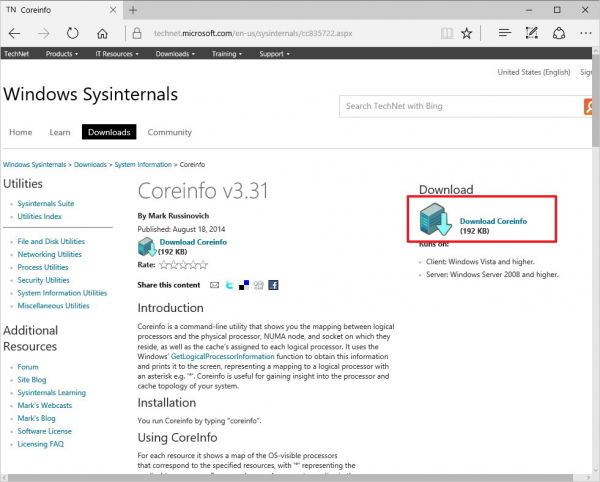
If you want to check whether your computer supports this feature or not, you can use the Coreinfo tool from Windows Sysinternals.
Step 1: Access Windows Sysinternals and download Coreinfo to your machine and install it.
http://go.redirectingat.com/?id=23432X820454&site=windowscentral.com&xs=1&isjs=1&url=https%3A%2F%2Ftechnet.microsoft.com%2Fen-us%2Fsysinternals%2Fcc835722%3Ff%3D255%26MSPPError%3D-2147217396&xguid=851708309f909dae5d5c49fc54f39b4d&xuuid=a2c040c18155dcf3512573f84e135b9c&xsessid=2b6fe55137d69f66349a47d61f7043b9&xcreo=0&xed=0&sref=http%3A%2F%2Fwww.windowscentral.com%2Fhow-upgrade-32-bit-64-bit-version-windows-10&xtz=-420
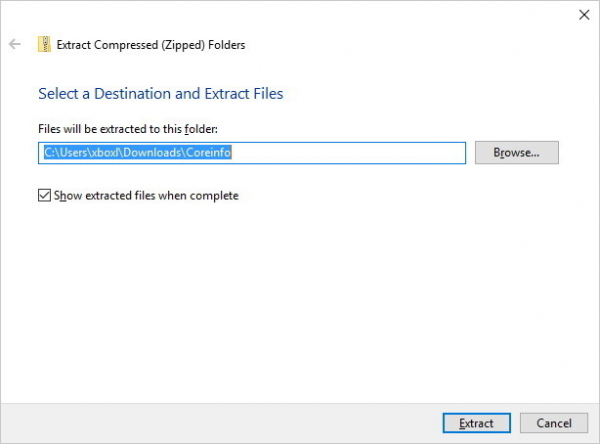
Step 2: Open the Coreinfo folder you just downloaded, right-click on the ZIP folder and select Extract all.
Step 3: After the Coreinfo folder opens, click File then select Open command prompt.
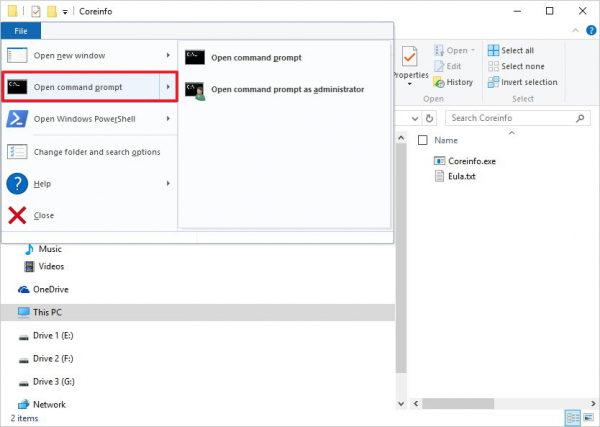
Step 4: Enter the Coreinfo command into the Command Prompt window and press Enter.
Step 5: Coreinfo will list the processor information.
If the 4 features PAE, NX, SSE2, and CX16 appear, it means you can upgrade to Windows 10 64-bit.
2. Ensure drivers for devices are 64-bit versions
In addition to the above factors, you must ensure other factors in the system such as the video card and sound card are compatible with the 64-bit version, because 32-bit drivers will not work.
3. Proceed to back up the system
To avoid some bad situations during the upgrade process, it is advisable for you to back up your system before upgrading.
Note: You should back up personal files to a USB drive or OneDrive because these files will be deleted during the installation process.
Guide to upgrade from Windows 10 32-bit to 64-bit
There is no direct path from the Windows 10 32-bit version to the 64-bit version. Therefore, the only solution is to completely erase the operating system installation.
Note: Before proceeding to erase the installation, you should ensure that your copy of Windows 10 has been activated. Go to Settings => Update & security => Activation to view the information.
1. Create Windows 10 installation media
Step 1: Connect your USB drive, requiring a minimum capacity of 4 GB
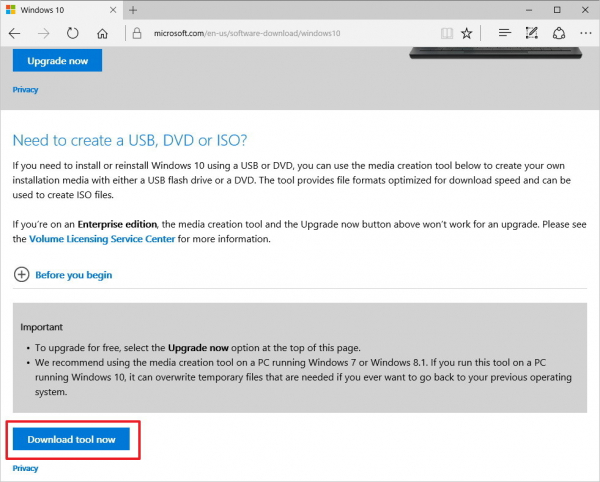
Step 2: Access Microsoft's Windows 10 download page.
https://www.microsoft.com/en-us/software-download/windows10
Step 3: Click the Download tool now button to download and save the Media Creation Tool on your desktop.
Step 4: Double-click on the MediaCrationTool.exe file.
Step 5: Click Accept to agree to the terms.
Step 6: Select Create installation media for another PC.
Step 7: Click Next.

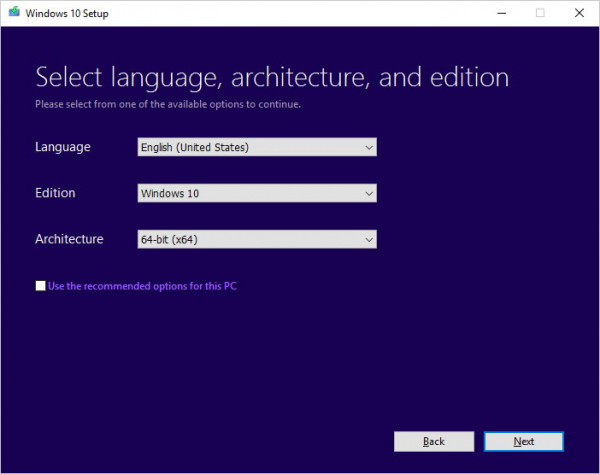
Step 8: Uncheck the option Use the recommended options for this PC.
Step 9: Select the language, edition, and choose Architecture as 64-bit (x64).
Step 10: Click Next.
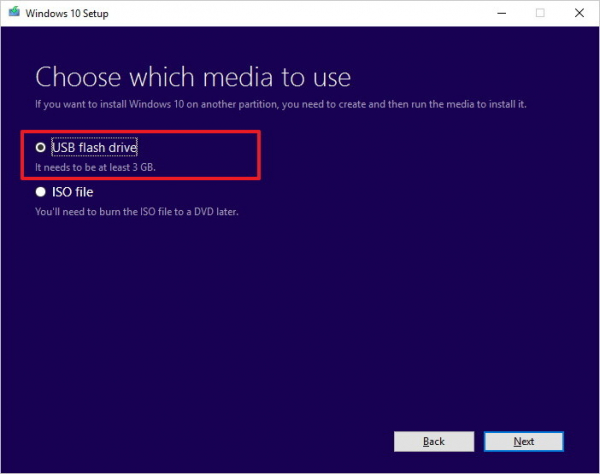
Step 11: Select the USB Flash drive option.
Step 12: Click Next.
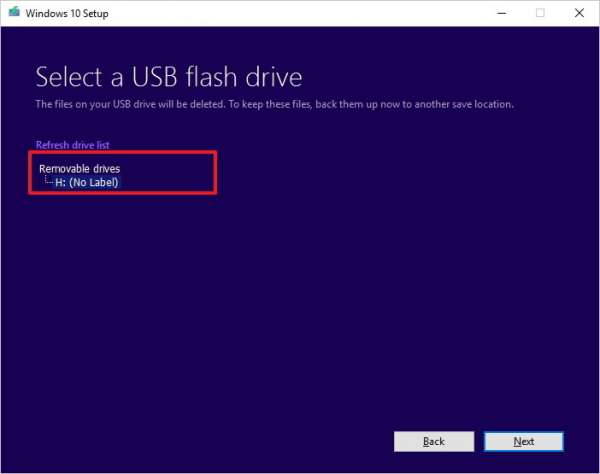
Step 13: Select your USB drive.
Step 14: Click Next.
Step 15: After the Installation media is installed, close the Media Creation Tool.
2. Install Windows 10 64-bit
Step 1: Restart your computer with the Installation media connected and start installing Windows 10.
Step 2: On the Windows Setup window, click Next.
Step 3: Click Install now.
Step 4: Since you have previously activated Windows 10, you can skip the Product key step.
Step 5: Accept the terms and click Next.
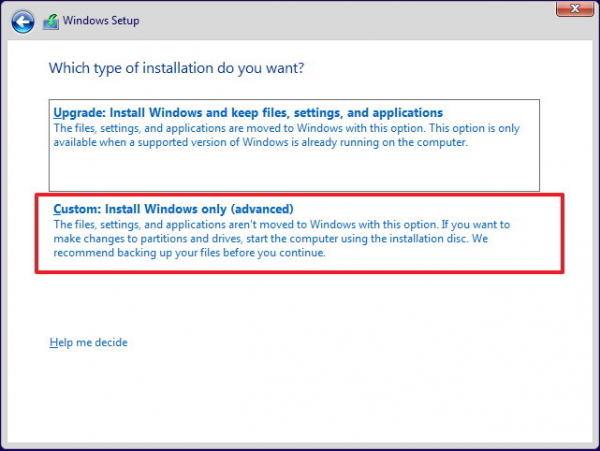
Step 6: Click Custom: Install Windows only (advanced).
Step 7: Select and delete the system partitions, usually Drive 0 Partition 1 and Drive 0 Partition 2.
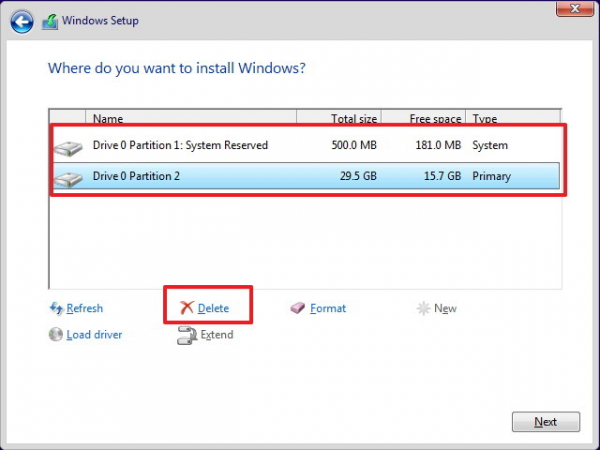
Step 8: Click Next and follow the on-screen instructions to complete the installation process.
After the installation is complete, go to Settings => Windows update to download the latest updates and drivers.
If some drivers are not available on Windows Update, you can check the manufacturer's website to download and install the necessary 64-bit driver versions.