
How to Choose a GPU for Each Application on Windows 10
Windows 10 now allows users to select a GPU for a game or specific applications through the Settings app. Previously, you had to use a manufacturer-specific tool like NVIDIA Control Panel or AMD Catalyst Control Center to assign a GPU for each application separately.
Why change the GPU used by specific applications?
Some desktops and most laptops have an integrated graphics card, which briefly means their processor includes an integrated video chip. However, integrated graphics aren't strong enough to handle graphics-intensive applications and games. This is why many computers also have a dedicated graphics card, using graphics chips typically manufactured by Nvidia or AMD. Dedicated graphics cards are much more powerful but also consume more power than integrated graphics.
To balance between performance and power usage, computers need to be able to use the right graphics option for every application and game you run. If the integrated graphics are strong enough for Paint 3D, then that's what the computer should use. However, if you want to play the latest 3D video game on Steam, then you should switch to using the much stronger Nvidia or AMD graphics card.
Typically, this switch between two graphics options is done automatically by the graphics driver. However, sometimes, you might want to specify for yourself whether an application or game should use integrated graphics or a dedicated graphics card on your computer.
Adding an app to set a preferred GPU in Settings
Step 1: Open Settings and click on the System icon.
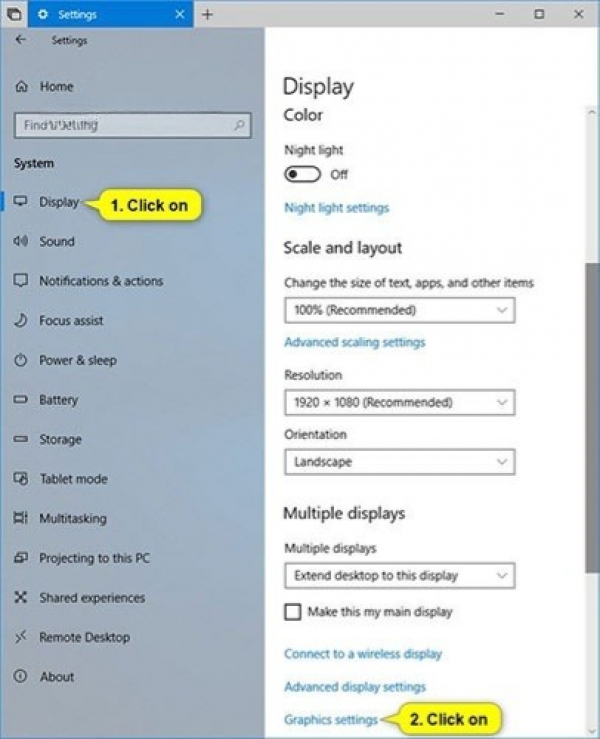
Step 2: Click on Display on the left side and click on the Graphics settings link on the right side.
Step 3: Perform step 4 (for a desktop app) or step 5 (for a Microsoft Store app) below, depending on the type of app you want to add.
Step 4: To choose a GPU for a desktop app
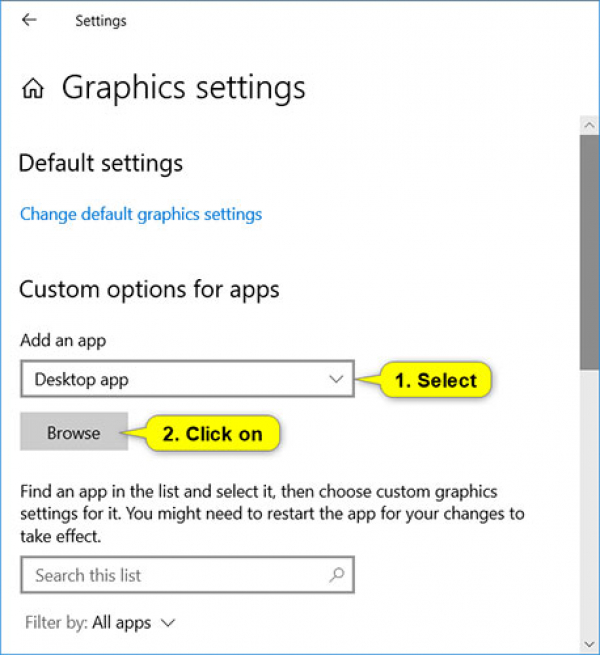
A. Select Desktop app from the Add an app dropdown menu and click on the Browse button.
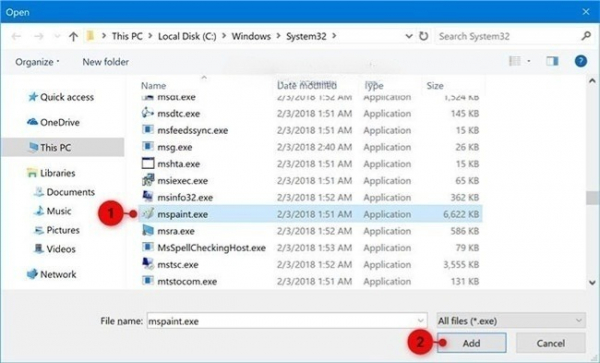
B. Navigate to and select the .exe file (for example, "mspaint.exe") you want to add, click on Add and move to step 6 below.
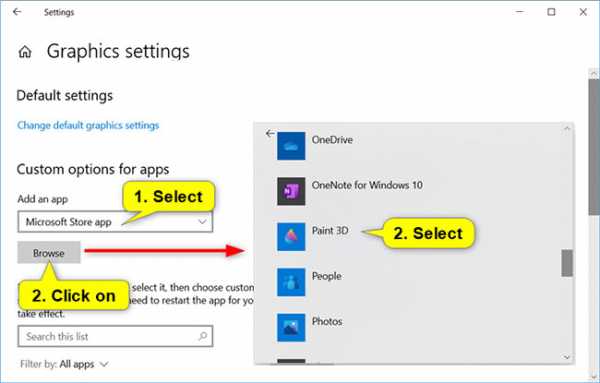
Step 5: To choose a GPU for a Microsoft Store app
A. Select the Microsoft Store app in the drop-down menu Choose an app to set preference or Add an app.
B. Perform one of the following tasks depending on the version of Windows 10 you have installed and proceed to step 6.
- Select an app (for example, "Paint 3D") from the dropdown menu you want to add and click on the Add button.
- Click on the Browse button and choose an app you want to add.
Step 6: Once you've finished adding the app, go to step 3 in part 2 to set the GPU you want for these apps.
Assigning an app to a GPU
To assign an app to a GPU, go to Settings > System > Display, scroll down and click on the Graphics Settings link.
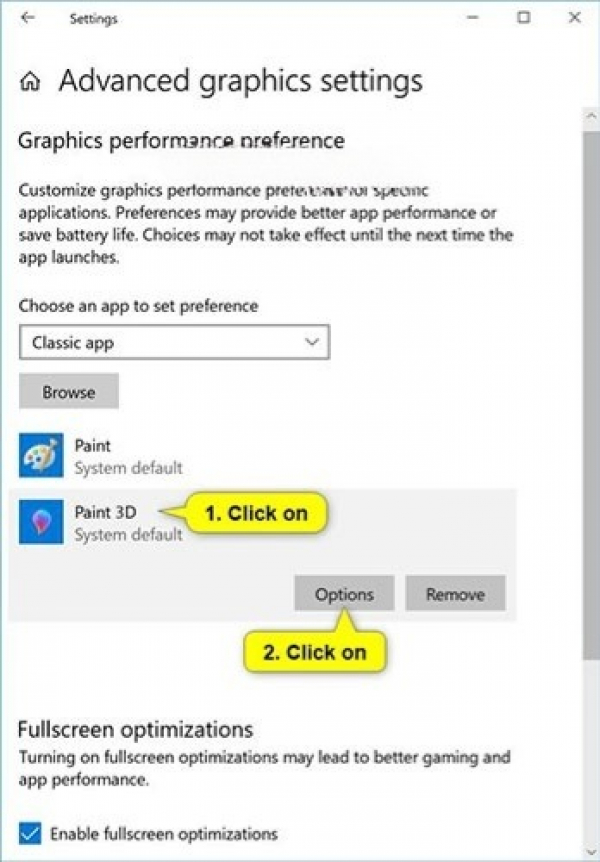
Click on an added app (for example, "Paint 3D") in the list you want to set or change the GPU option for and press the Options button.
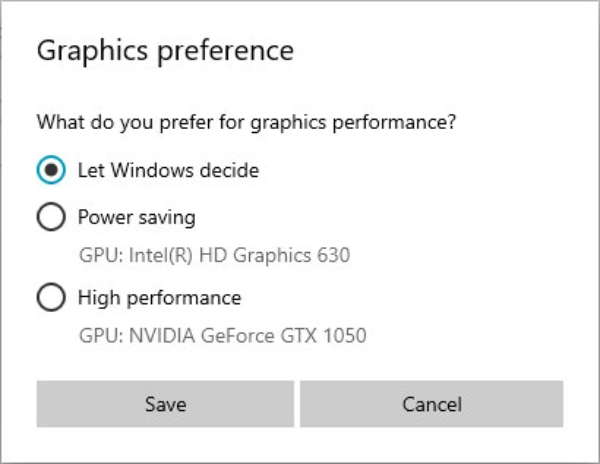
Select System default, Power saving, or High performance for the GPU option you want for this app and click on Save.
- System default: Let Windows decide the best GPU for the application.
- Power saving: Requires running the application on the most energy-efficient GPU available.
- High performance: Requires running the application on the highest performance GPU available.
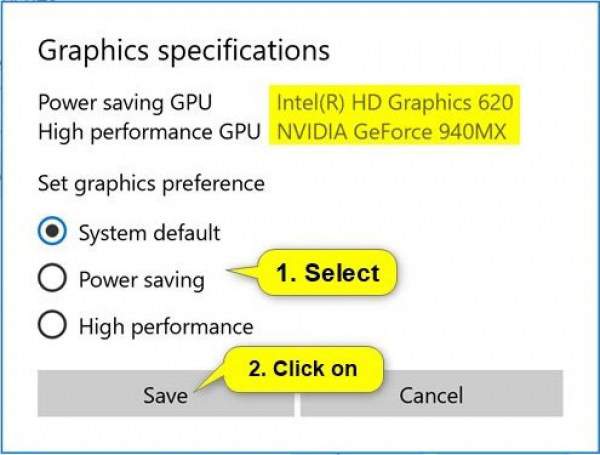
Generally, the power-saving GPU is the integrated GPU on the system, and the high-performance GPU is the discrete or external GPU. If you have both discrete and external GPUs on the system, then the external GPU is considered the high-performance GPU.
Starting with Windows 10 build 20190, Microsoft added the ability for you to specify exactly which GPU you want an app to run on with the new “Specific GPU” option.
Once done, you can close Settings if you wish.
Removing an app from the preferred GPU list in Settings
Removing an added app from the preferred GPU list will cause the app to use the system's default option.
Step 1: Open Settings and click on the System icon.
Step 2: Click on Display on the left side and press on the Graphics settings link on the right side.
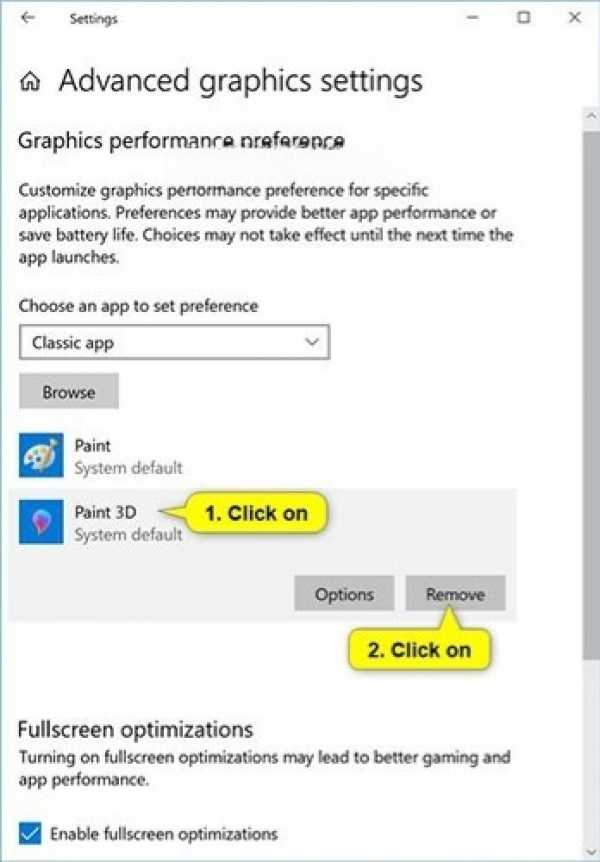
Step 3: Click on an added app (e.g., "Paint 3D") in the list you want to remove and select Remove.
Step 4: Once completed, you can close Settings if you wish.
Checking which GPU an app is using
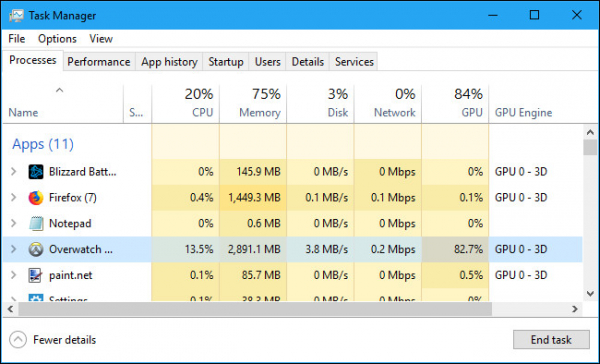
To check which GPU an app or game is using, open Task Manager and enable the “GPU Engine” column on the Processes tab. Then, you'll see which app is using which GPU. You can tell which GPU is linked to which number from the Performance tab.