
Guide to Update Ubuntu Using Terminal and USB Drive
Using an operating system directly from a USB drive, such as Windows, offers many benefits. You can recover data from a hard drive and copy it to external hard drives when the computer won't boot or needs a virus scan. This article from Gpwebmedia.net will guide you on how to boot and update Ubuntu from a USB drive.
In this guide, Gpwebmedia.net will help you boot and update Ubuntu from a USB drive as well as from other Linux distributions. You can automatically save changes and settings on the USB drive and restore them each time you reboot via a second partition.
With this method, you can run Ubuntu and all settings and files on different computers. Refer to the content below for more details.
Note: The instructions below do not require Ubuntu 8.10 because the USB Ubuntu Creator is already integrated.
Starting and Running Ubuntu from a USB Drive
Preparation:
- A 2.0 USB drive with at least 1GB capacity.
- A computer with a CD drive (with the ability to boot from a USB drive. Newer motherboards usually meet this requirement. Update the BIOS from the computer manufacturer to ensure everything works well).
- An Ubuntu LiveCD (if the computer already has Ubuntu installed, you do not need the LiveCD).
- Knowledge of Terminal.
Visit ubuntu.com to download the Ubuntu LiveCD. Then, download the Ubuntu Desktop LiveCD ISO file and burn it to a CD using Nero or another program.
Changing Boot Order in BIOS
The next step is to adjust the boot order in BIOS. Turn on the computer and during startup, press the key to enter the BIOS Setup Utility. This key varies depending on the computer, often F2 or Delete.
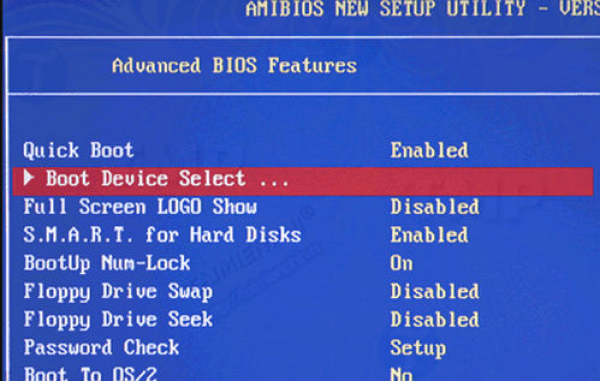
Use the navigation keys to find the boot order settings. You can adjust this order to select the device you want to boot first.
Additionally, when booting, you have an option to temporarily boot from a specific device. You can use this option if you only want to boot from a device once.
Booting from Ubuntu LiveCD
Turn off the computer and insert the CD into the CD/DVD drive. Turn on the computer and set the BIOS to boot from the CD. Ubuntu will load up, and you will recognize it.
If your computer already has Ubuntu installed, skip this step. Just boot the computer and log in.
Formatting the USB Drive
The next step is to format the USB drive. In this guide, we will create 2 partitions: one for the actual Ubuntu operating system and one for another operating system to automatically save changes and settings on the USB drive, which can be restored each time you boot. You can also store personal data on the second partition.
Before performing these steps, back up all data on the USB drive to avoid loss. This operation will erase all files and data on your USB drive.
Step 1. Back up data on the USB drive.
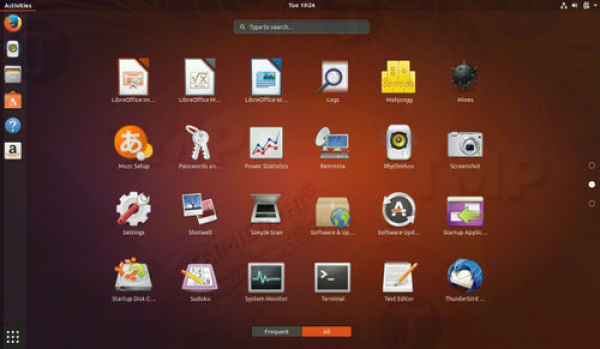
Step 2. Open Terminal from the Applications menu.
Step 3. Type sudo su to switch to superuser.
Step 4. Run fdisk -l and identify your USB device. Assume the USB drive is sda, type format sda1.
Step 5. Type umount /dev/sdb1.
Step 6. Type fdisk /dev/sdb
- Type p to view the current partition list and `d` to delete that partition.
- Type p again to display the remaining partitions (if any), and perform d to delete the partition if needed.
- Type n to create a new partition.
- Type p to select the primary partition.
- Type 1 to number the first partition.
- Press Enter to select partition 1 as the default partition.
- Type +750M to set the size for the partition.
- Type a to activate the partition.
- Type 1 to select partition 1.
- Type t to change the partition file system.
- Type 6 to select the FAT16 file system.
- Type n to create a new partition.
- Type p to view information about the primary partition.
- Type 2 to mark the second partition.
- Press Enter to use the default partition.
- Press Enter again to select the last partition as the default partition.
- Type w to create a new partition table.
Step 7. Type umount /dev/sdb1, then type umount /dev/sdb2.
Step 8. Run mkfs.vfat -F 16 -n Ubuntu /dev/sdb1. This will format the first partition.
Step 9. Next, type mkfs.ext2 -b 4096 -L casper-rw /dev/sdb2 to format the second partition.
Step 10. Close Terminal and remove the USB drive.
Installing Ubuntu on the USB Drive
After formatting the USB drive, the next step is to install Ubuntu on the USB drive partition.
Step 1. Plug the USB drive into the computer.
Step 2. Open Terminal.
Step 3. Use the command apt-get update to update.
Step 4. Visit Ubuntu Packages to download Mtools and install it. Then, download Syslinux and install it.
Download Mtools here: Download MTools
Download Syslinux here: Download Syslinux
Step 5. In the Terminal window, type syslinux -sf /dev/sdb1.
Step 6. Use the command cd /cdrom.
Step 7. Type cp -rf casper disctree dists install pics pool preseed .disk isolinux/* md5sum.txt README.diskdefines ubuntu.ico casper/vmlinuz casper/initrd.gz /media/Ubuntu/.
Ignore any errors about cannot create symbolic link.
Step 8. Access the first partition on the USB drive and rename isolinux.cfg to syslinux.cfg.
Step 9. Modify syslinux.cfg similarly to the attached file HERE.
Completion
Simply restart the computer and set the BIOS to boot from the USB drive.
If you cannot boot and run Ubuntu from the USB drive, your USB drive may have an issue with the MBR. To fix the MBR on the USB drive, open Terminal in Ubuntu and execute the following command:
sudo apt-get install lilo
Then, type the command lilo -M /dev/sdb.
From now on, you can experience Ubuntu anywhere with all necessary settings and files.
In this guide, Gpwebmedia.net introduced how to boot and run Ubuntu from a USB drive. If you want to switch to installing Ubuntu directly on your computer, you can choose to install it alongside Windows 10, 8, or 7 according to the UEFI and GPT standard, a simple and convenient process.