Wi-Fi Connected but No Internet: Causes and Solutions
The phenomenon of having Wi-Fi but no internet connection is quite common and can cause a lot of frustration for users. Have you ever logged into a Wi-Fi network successfully but couldn't access the internet? Let's explore the reasons and solutions for this issue on both phones and computers with Gpwebmedia.net!
Signs Your Device is Connected to Wi-Fi but Can't Access the Internet
The issue of Wi-Fi with no internet often occurs when connecting to a public or unstable Wi-Fi network. You can easily identify this problem when you have successfully logged into the Wi-Fi network, the Wi-Fi signal is shown, but messages can't be sent, and web pages won't load.
Causes of Wi-Fi Connected but No Internet
Some common reasons for this issue include:
- Wi-Fi signal problems due to many obstacles or too many devices accessing simultaneously.
- Incompatible phone IP address.
- Inappropriate connection between the main Wi-Fi network and the Wi-Fi being used.
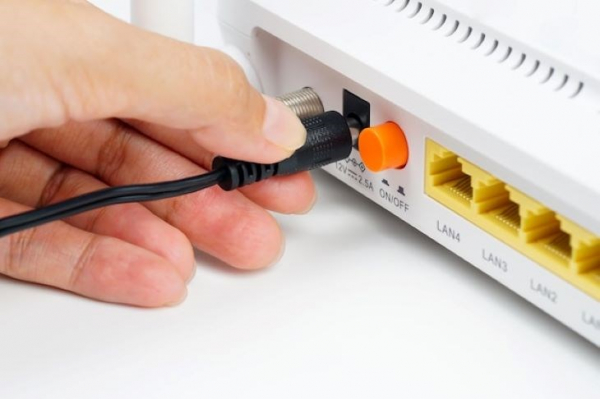
- Faulty network cables and ports.
From these causes, we see two main scenarios: either the network access device is faulty, or the Wi-Fi router is faulty. Let's explore how to thoroughly fix these issues.
Solutions for Wi-Fi Connected but No Internet on Phones
1. Check Wi-Fi Connection Status on Other Devices
Before blaming the Wi-Fi router, check the Wi-Fi connection status on other devices. If other devices can access the internet normally, then the issue is with your device.
2. Forget and Reconnect to the Wi-Fi Network
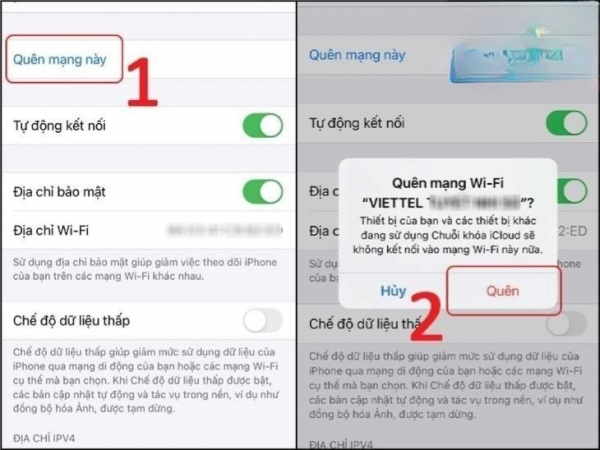
Often, network settings changes can cause access issues. Follow these steps to forget and reconnect to the Wi-Fi network:
Step 1. Go to Settings > Wi-Fi > Wi-Fi network name (currently connected) > "i" icon.
Step 2. Select "Forget This Network" and confirm.
Step 3. Reconnect to the network and enter the new password.
3. Restart Your Phone and Wi-Fi Router
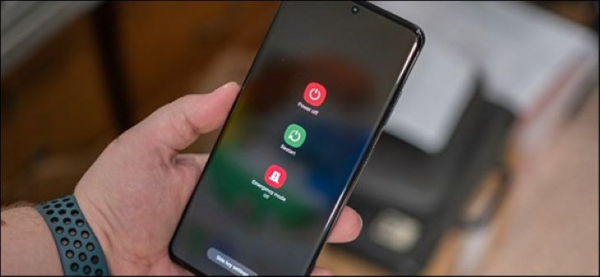
Another common cause is the phone's RAM being overloaded. Restarting your phone can clear the RAM and help it run smoother. Also, restart the Wi-Fi router to ensure the modem is functioning correctly.
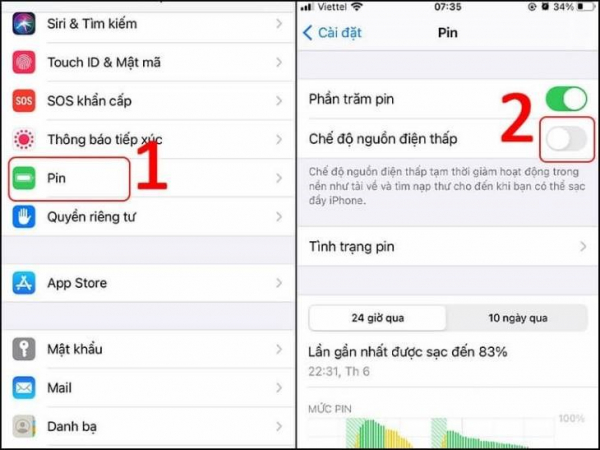
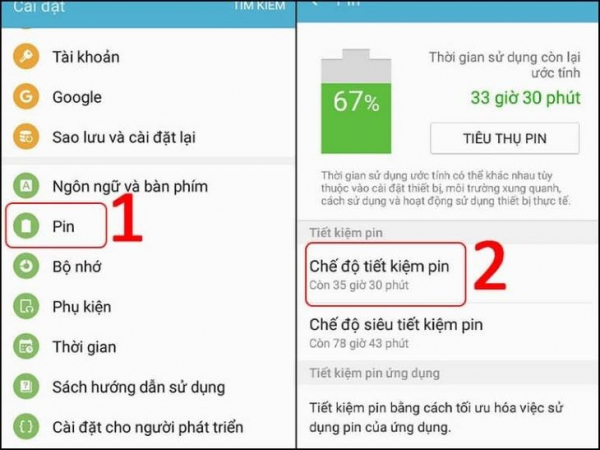
4. Check and Turn Off Low Power Mode
Sometimes, the phone can't connect to the internet due to Low Power Mode being activated. This mode limits features that drain the battery, including internet connections. Turn off this mode to restore internet connectivity.
For iPhones: Settings > Battery > Low Power Mode.
For Android phones: Settings > Battery > Battery Saver Mode.
5. Reconfigure the IP Address
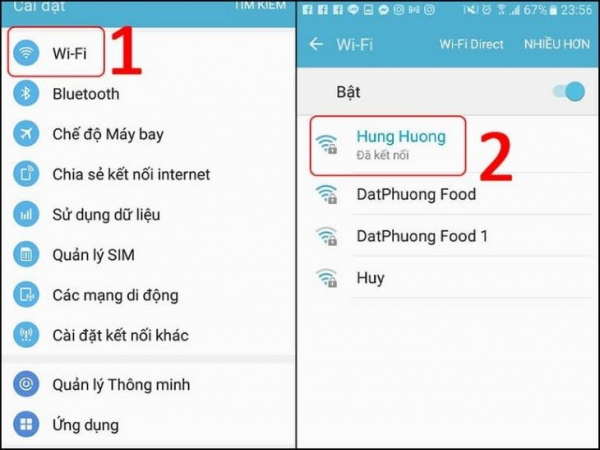
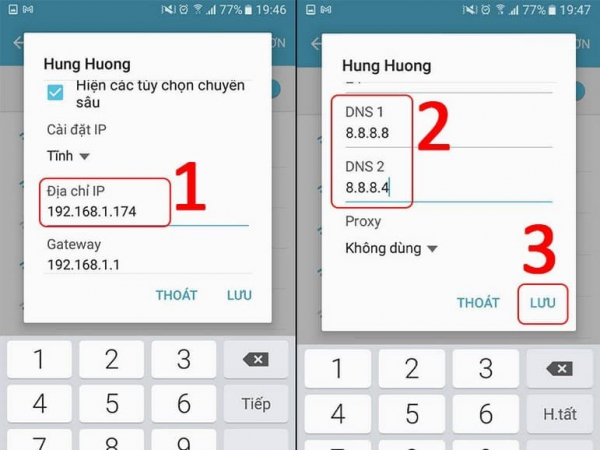
Incorrect or duplicate IP addresses, or incorrect Gateway or DNS settings, can cause this issue. Follow these steps to reconfigure the IP address:
Step 1. Go to Settings > Network Settings > Select the Wi-Fi network.
Step 2. Choose Advanced Options, then Static mode.
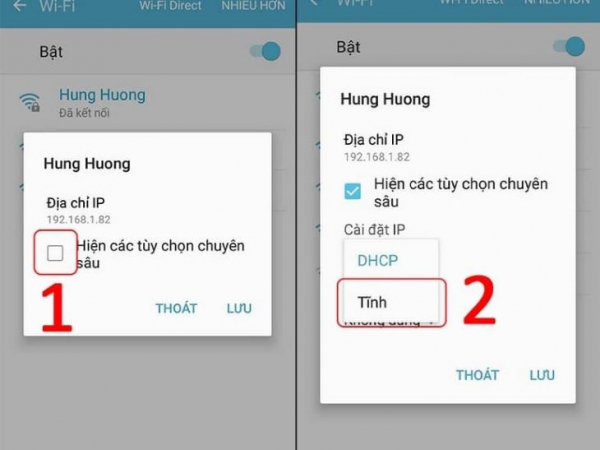
Step 3. Change the IP address and DNS.
- IP Address: Change the last three digits to any number from 1-250 (avoid the first and last 10 numbers).
- DNS: DNS 1: 8.8.8.8; DNS 2: 8.8.4.4
Save the changes.
6. Restore Network Settings
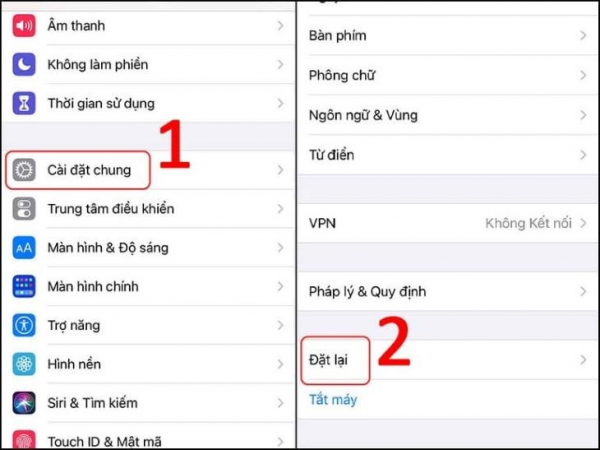
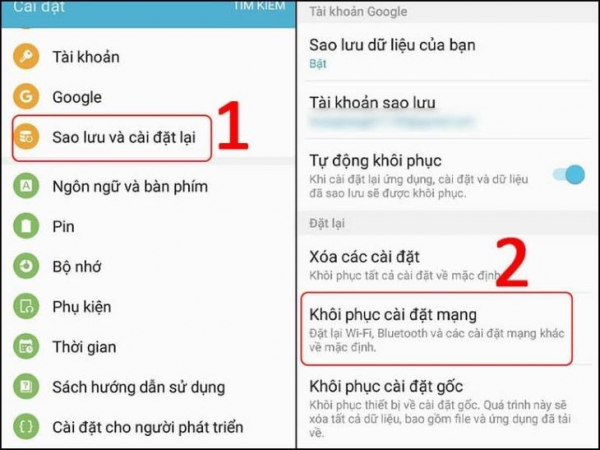
Issues like viruses, software conflicts, or changes during device restoration/resetting can affect network stability. Restore network settings to fix this.
For iPhones: Settings > General > Reset > Reset Network Settings.
For Android phones: Settings > Backup & Reset > Reset Network Settings > Confirm.
7. Check Network Cables
If your devices are working fine, check the network cable connections. Network cables should be linked to the WAN port of the router and the computer's LAN port.
If the connections are correct, the router's LED indicators will be normal. If they are incorrect or loose, the LEDs will not light up. Check and secure the cable connections.
8. Seek Support from Your ISP
If your devices and router are working but there's still no internet, contact your internet service provider for assistance.
Solutions for Wi-Fi Connected but No Internet on Computers
1. Set a Static IP Address (Windows 10)
Too many devices on the network or a faulty Wi-Fi signal can prevent your computer's IP from receiving a signal. Set a static IP address as follows:
Step 1. Click the Wi-Fi icon > Open Network & Internet settings.
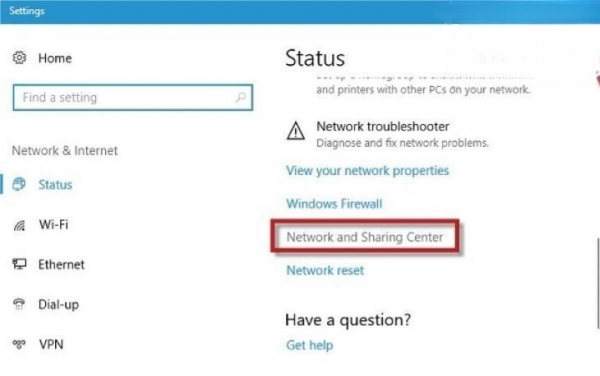
Step 2. In Settings, go to Status > Network and Sharing Center.
Step 3. In Connection, select the Wi-Fi network.
Step 4. In Wi-Fi Status, click Properties.
Step 5. In Local Area Connection Properties, under Networking > This connection uses the following items, check Internet Protocol Version 4 (TCP/IPv4) and click Properties.
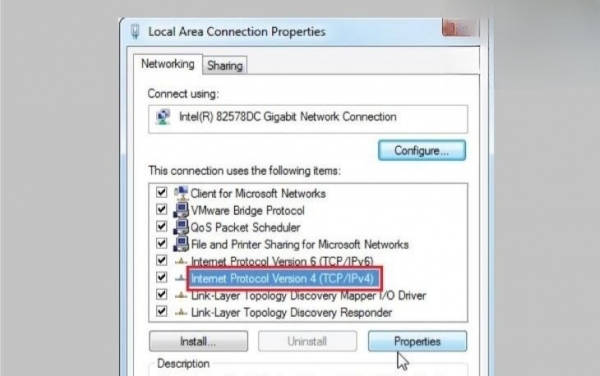
Step 6. In General, select Use the following IP address and Use the following DNS server addresses, then configure the settings and save.
2. Fix Limited Access Error
Limited Access is another common error when connected to Wi-Fi but no internet. Follow these steps to release and renew the IP address:
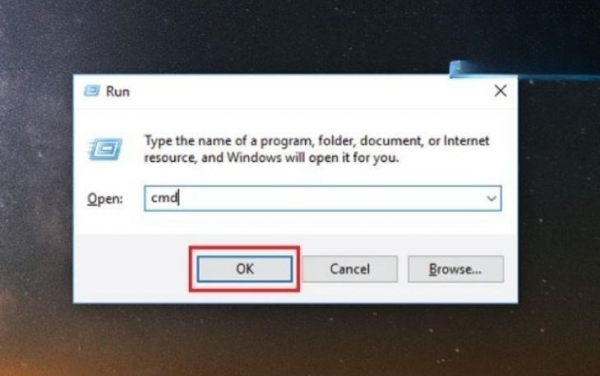
Step 1. Press Windows+R to open the Run window. Enter cmd and click OK.
Step 2. In the Command Prompt, type ipconfig/release and press Enter to release the IP address.
Step 3. Type ipconfig/renew and press Enter to renew the IP address.
3. Update Wi-Fi (WAN) Driver
Using outdated or faulty drivers can prevent internet access. Update your Wi-Fi drivers as follows:
Step 1. Click the Windows icon, then Device Manager.
Step 2. In Device Manager, under Network adapters, right-click the Wi-Fi adapter and select Update Driver.
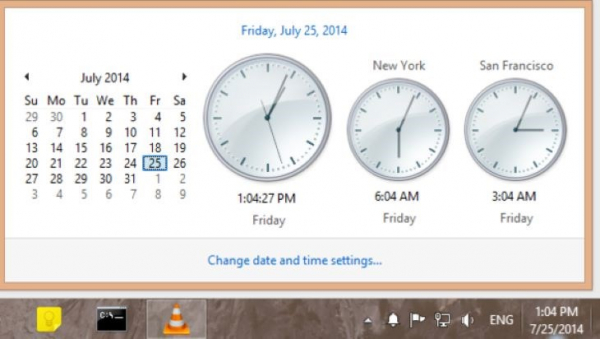
4. Check System Time
An incorrect system time or time zone due to an old operating system can affect internet connection quality. Adjust the time settings to match your browser's settings.
5. Use a Different Web Browser
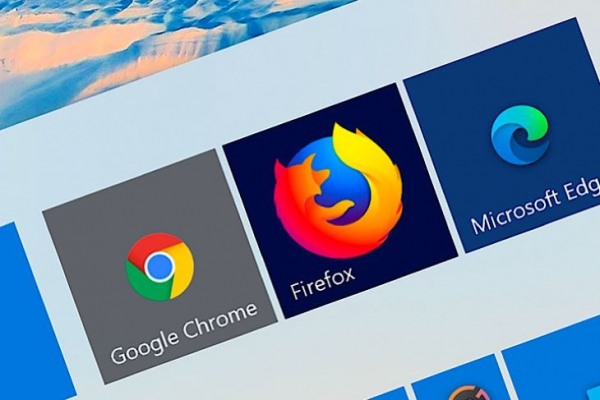
Sometimes, browser issues can prevent internet access. If you can't access the internet on one browser, try another browser to check the connection.
6. Update Your Web Browser
Updating your web browser can help restore internet connectivity. Older browser versions might restrict internet access even if you're connected to Wi-Fi.
This guide has provided you with the causes and solutions for phones and computers connected to Wi-Fi but not the internet. Hopefully, this information will be useful when you encounter this issue!
