
8 ways to quickly master the Photos app on iPhone
The Photos app on the iPhone is not just a place to store memories. If you're new to iOS or not familiar with Apple's Photos app, check out these tips and tricks to quickly master this app.
1. Organize photos with Albums
You can easily sort photos into albums in the Photos app. This makes searching for and accessing desired images easier without having to scroll through a messy pile of photos.
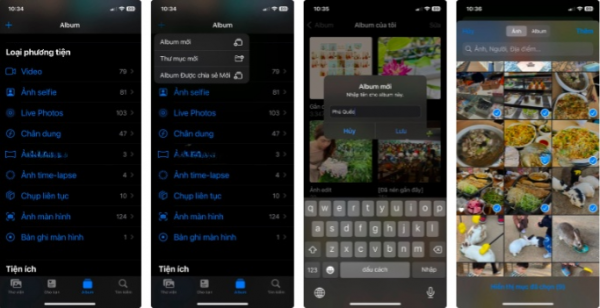
To create a new album, follow these steps:
- Open the Photos app and switch to the Album tab.
- Tap on the plus icon (+) in the upper left corner and select New Album.
- Enter a name for this album then tap Save.
- Search for criteria (such as people, places, or favorites) to sort photos and select them.
- Tap Add in the upper right corner to save your selection.
You can also edit or delete this album anytime by opening it and tapping on the ellipsis (...) icon in the upper right corner.
2. Search for photos using keywords or categories
The search feature in the Photos app works like a mini search engine. Just enter a keyword or phrase, and it will instantly display all related images. You can refine your search further using categories like screenshots, selfies, live photos, or even specific content within an image. Follow these steps:
- Go to the Search tab in the Photos app from the bottom menu.
- Enter the keyword or category you're searching for.
- Browse through the results and tap on a photo to view it.
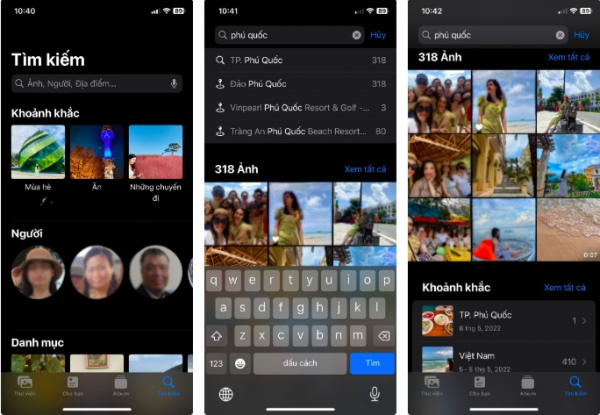
Additionally, you can filter results based on date, location, or specific people.
3. Adjust the date, time, and location of images
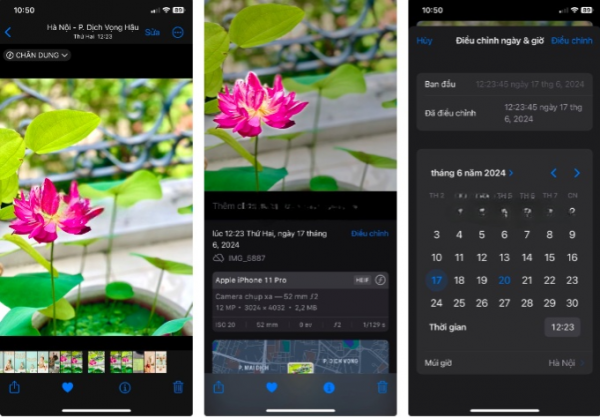
The Photos app automatically sorts photos based on date and location data, although you can manually adjust this information if needed. This feature is useful for old photos or to search for images from different locations later.
To view an image's metadata on the iPhone and then edit it, follow these steps:
- Open the photo you want to adjust in the Photos app.
- Tap on the information (i) icon in the bottom menu bar.
- Tap Adjust at the top of the Information panel.
- Set a new date and time using the clock and calendar.
- Tap Adjust in the upper right corner to save the changes.
To revert to the original date and time, you can follow the same steps and tap on Revert in the upper right corner.
Similarly, you can change the location of a photo by following these steps:
- Tap on the information (i) icon after opening the photo and swipe up to see location information.
- A map preview with a pinned location will appear. Tap Adjust in the bottom right corner of the preview.
- Enter a new location in the search bar and select it from the list.
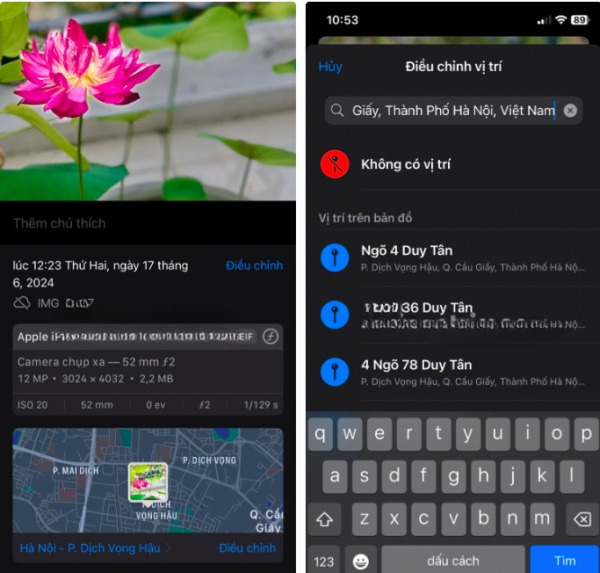
The map preview will show the new location in the information panel. To revert to the original location, repeat the steps above and tap Adjust > Revert.
4. Use Visual Lookup to identify objects
Another handy feature in the Photos app is Visual Lookup, which uses Machine Learning to identify objects in photos and provide related information about them. It can recognize objects such as landmarks, plants, pets, and even types of food.
To use this feature, open the Photos app and browse your photo library. Look for a photo with the Visual Lookup icon (similar to the information button but with a sparkling effect).
Note: If you see the regular information button, it means Visual Lookup is not available for that photo.
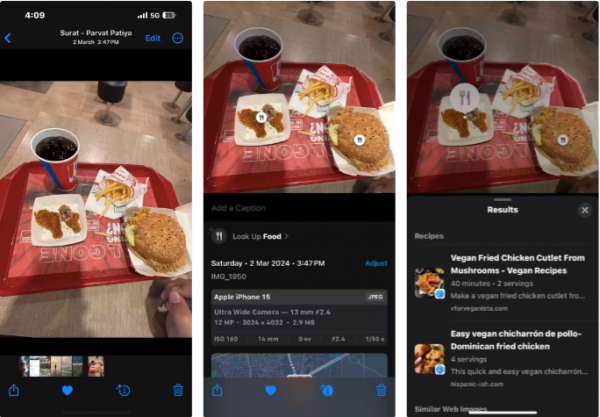
After tapping on the information (i) icon, you will see the Visual Lookup icon on an object in the photo. Tap on it for more information, such as images, descriptions, and related Wikipedia links. The icon may vary depending on the object - for example, a fork icon for food or a leaf icon for plants.
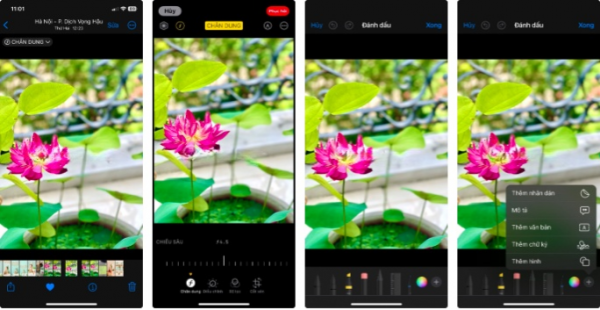
5. Annotate photos with Markup tools
The integrated Markup feature contains a range of annotation tools that you can use to draw or add text to images to give them a personal touch. Here's how to access it:
- Open the photo you want to edit in the Photos app and tap Edit.
- Now, tap on the Markup icon (looks like a pen tip) at the top.
- Select a color and drawing tool from the toolbar at the bottom.
- Tap on the plus icon (+) at the bottom to add text or shapes to the photo. Shake the phone to undo or use the undo/redo arrows at the top.
- When finished, tap Done to save the changes.
To remove annotations, reopen the photo and tap Edit > Revert > Revert to Original.
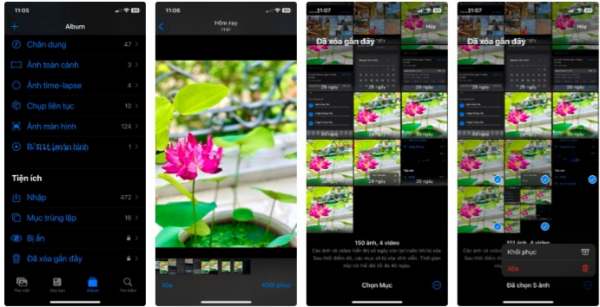
6. Recover accidentally deleted photos
When you delete a photo or video, it moves to the Recently Deleted album and stays there for 30 days before being permanently deleted from the device. So, as long as you act quickly, you can recover accidentally deleted photos on the iPhone by following these steps:
- Open the Photos app and go to the Album section.
- Scroll down and tap on Recently Deleted.
- Press and hold the file you want to recover, then select Recover.
- To recover all photos, tap Select at the top, then tap on the ellipsis (...) icon in the bottom right corner and choose Recover.
The recovered photos will be returned to their original albums.
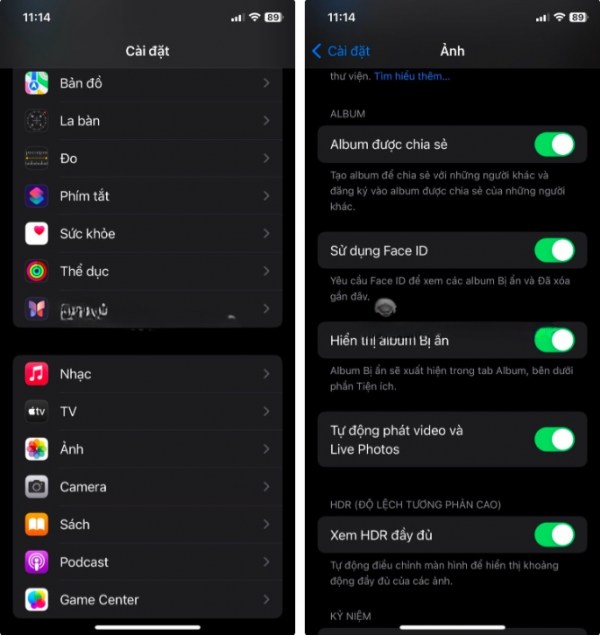
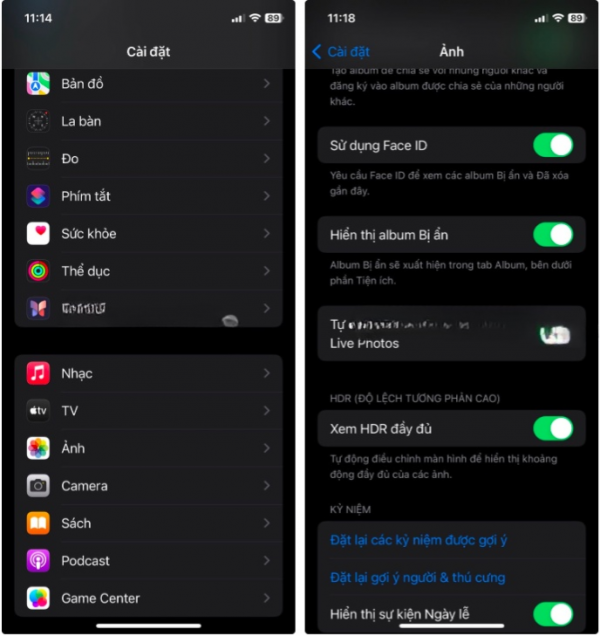
7. Lock the Hidden and Recently Deleted albums
When you hide photos or videos on the iPhone, they move to the Hidden album. However, both the Hidden and Recently Deleted albums still appear and are accessible to anyone with access to the device. To prevent this, you can lock these albums using Face ID or Touch ID.
- Open the Settings app on the iPhone.
- Scroll down and select Photos.
- Now, scroll down and turn on Use Face ID (or Use Touch ID).
The next time you open the Hidden or Recently Deleted album, it will require Face ID or Touch ID authentication to access the content. This adds an extra layer of security and ensures private photos are truly hidden. You can even lock the Photos app on your iPhone using the built-in Shortcuts app if needed.
8. Hide the Hidden Photos album
After locking the Hidden album, you can hide that album from your Photos app. To hide the Hidden album on iOS, follow these steps:
- Open the Settings app.
- Scroll down, find, and select the Photos app.
- Scroll down and turn off Show Hidden Album.
The Hidden album will now disappear from the Photos app. If you want to access it again, you must go to Settings > Photos and turn on Show Hidden Album.
Surely these tips and tricks will help you quickly master the Photos app on the iPhone. Whether you want to efficiently organize your photos, make them more private, or recover deleted images, this list meets your needs.