
How to install Windows 11 on Steam Deck
Do you want to have a familiar operating system or Game Pass on your Steam Deck? You can dual boot SteamOS with Windows on the device. Here is a detailed guide on how to install Windows 11 on your Steam Deck.
If you have already prepared a flash drive or SD card containing all the downloaded software, you can now start turning your Steam Deck into a Windows experience. The example will use an SD card so there's no need to deal with a USB hub or dock.
1. Install Ventoy on the flash drive or SD card
To be able to run both GParted and Windows 11 ISOs from one SD card without needing to format it multiple times, you will need to use Ventoy. This will make everything more convenient.
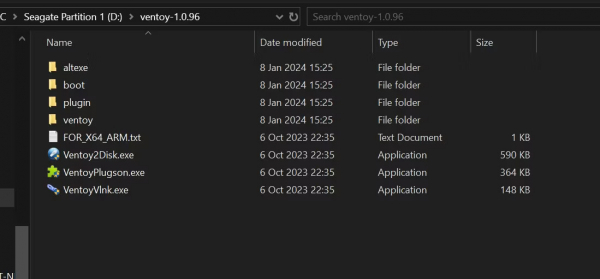
To install Ventoy on a flash drive or SD card, you need to plug it into a PC and open the Ventoy folder you extracted earlier. Then click on Ventoy2Disk.exe.
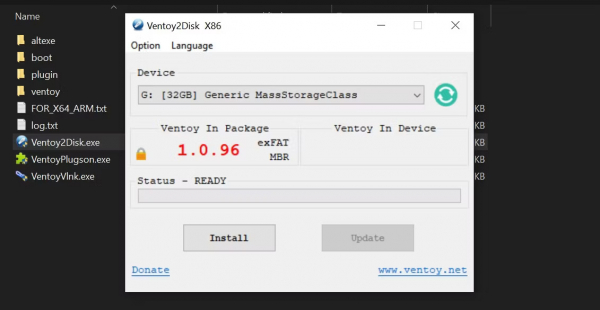
Next, you will choose the device where you want to store Ventoy. In the example case, it's a 32GB SD card. Click on Install.
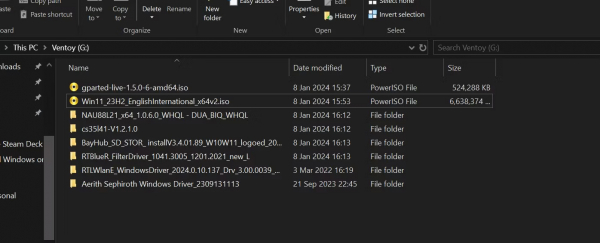
Now that Ventoy is installed, copy GParted, the Windows 11 ISO, and a folder containing Windows drivers for the Steam Deck. Now, you can insert the SD card into the Steam Deck.
2. Enter the Steam Deck's boot manager
Next, you will need to boot from the SD card or flash drive you connected to the Steam Deck using the device's boot manager.
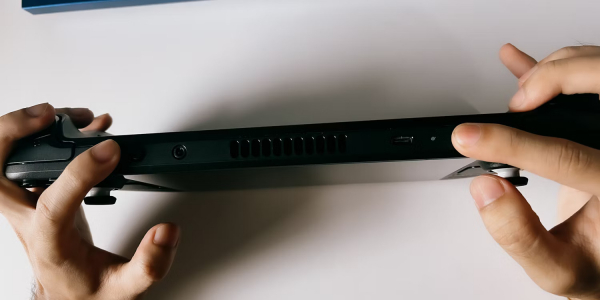
To do this, first, turn off your Steam Deck. After turning it off, hold the volume down button and the power button until you hear a chime. When you hear the chime, release the power button but continue holding the volume down button until the boot manager appears, as shown in the image below.
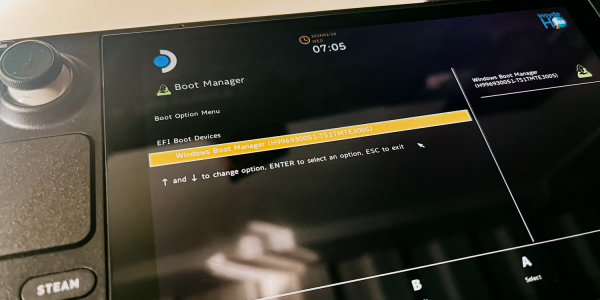
If you hold the power button after the bell rings, it's very likely you will turn off the Steam Deck again.
When you are in the boot manager, select the SD card or flash drive. This will display Ventoy, as well as both the Windows ISO and GParted.
3. Use GParted to partition the internal SSD
Now, you will need to partition the Steam Deck's SSD. Otherwise, you will likely not be able to install Windows 11 on the /home partition and you will also end up deleting SteamOS from your drive.
If you only want Windows on the Steam Deck, you can also use Ventoy to delete all partitions and leave the combined partition as unallocated or format it as NTFS. However, the article does not recommend this because SteamOS is really the best way to experience the Steam Deck. It would be better to have the option to switch between these two options rather than just using Windows.
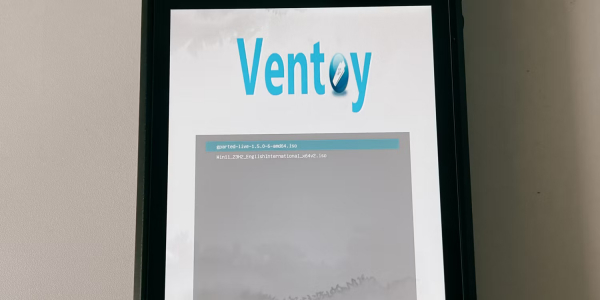
On Ventoy, select GParted to run. You can run it in normal mode, but if that doesn’t work, grub2 might help.
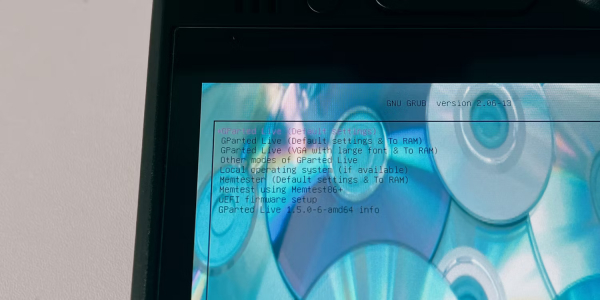
When GParted opens, you will be greeted with some settings before you can proceed with partitioning. First, you will need to select settings. Choose the first one - GParted Live (Default Settings).
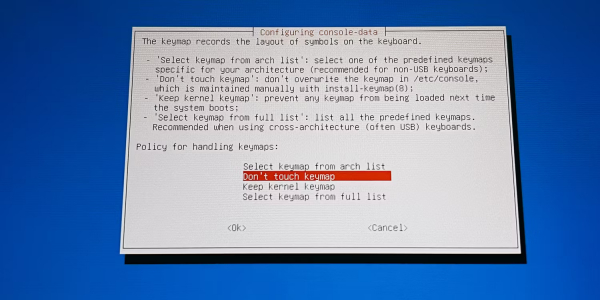
Next, select Don’t touch keymap then choose the language you want. If you intend to use English, just press A on the Steam Deck until you get to the main screen.
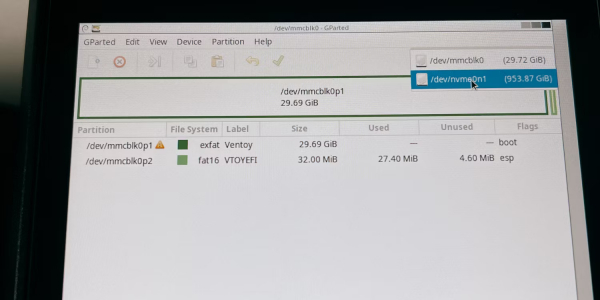
Finally, you are ready to partition your SSD. At this point, you might want to plug in a mouse and keyboard for easier navigation. If the SD card or flash drive is the only thing you can see, switch it to the SSD in the drop-down menu at the top right.
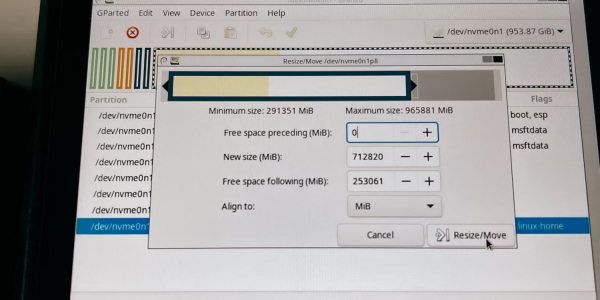
To partition your SSD, right-click on the /home partition or the largest partition on the SSD. Click on Resize/Move and move from right to left, leaving space for a new unallocated partition.
The example case will leave about 250GB or about 250,000MB for Windows 11. Click on the Resize/Move button at the bottom right to make your changes.
Finally, click on the green checkmark on the toolbar. Forgetting to do this will not apply your partition changes.
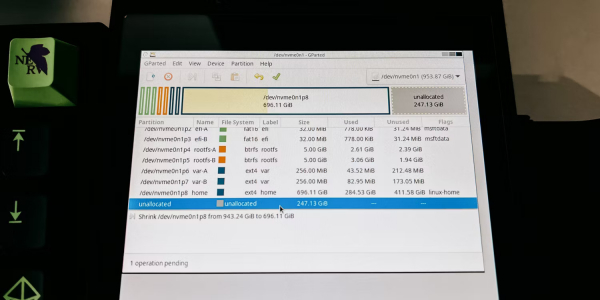
Then, the software will process the new partition size, which might take a few minutes depending on the capacity of your SSD. Once done, now you can press the power button to exit GParted and power off.
4. Set up Windows 11 on the Steam Deck
Now, you're ready to install Windows on your Steam Deck. However, before you access the boot manager, unplug any other USB devices you were using except for the flash drive. This helps prevent any ISO or Ventoy malfunctions.
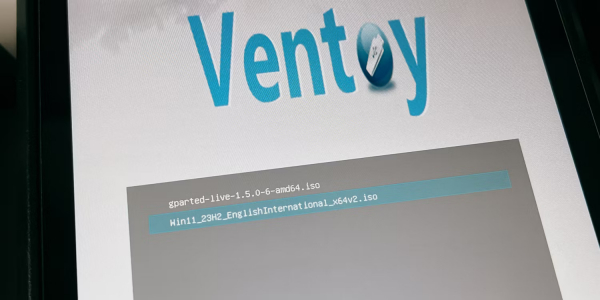
Return to the boot manager (using the volume down and power button) and select the SD card or flash drive again. When Ventoy opens, this time select the Windows 11 ISO.
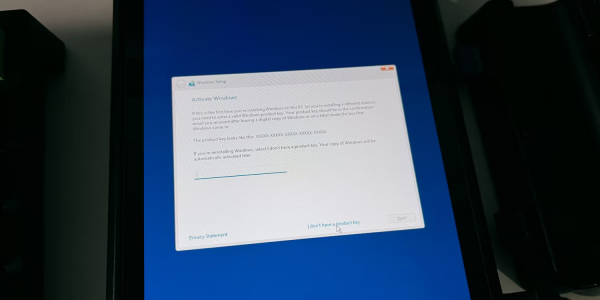
Just follow the setup by selecting the appropriate language and keyboard layout until you get to the Windows key part. There, you can select I don’t have a product key if you don't have one.
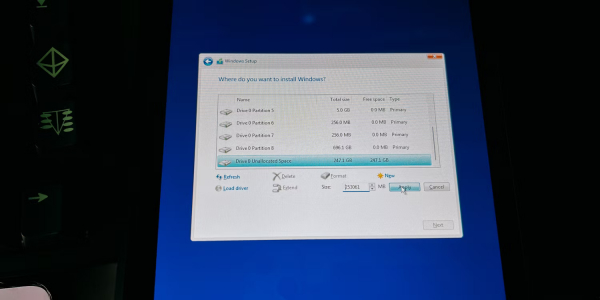
Continue until you get to the Where do you want to install Windows? screen. You will want to scroll down to the bottom and click on the drive that says Unallocated space. Next, click on New and it will automatically add the right size for you. So, just click on Apply.
It will then start installing Windows onto that partition. After installing Windows 11, you will have to go through another setup process.
5. Install Windows drivers for the Steam Deck
After installing Windows, now you can install drivers for your Steam Deck.
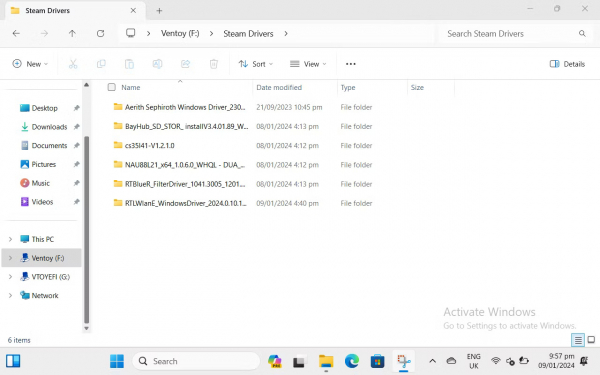
To do this, open File Explorer and click on the Ventoy drive. Open the folder where you placed the Steam Deck drivers inside and start with any of them.
If you are prompted to restart, don’t do it. It's more convenient to restart after all the drivers have been installed.
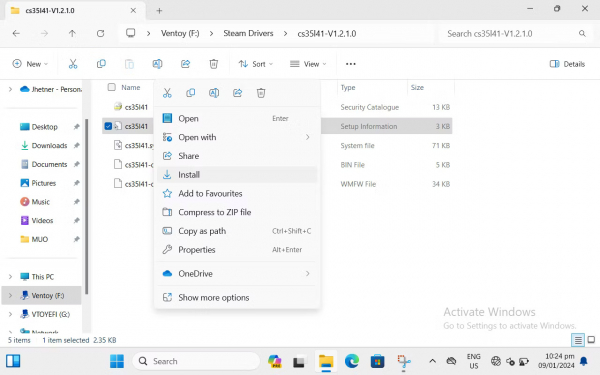
Continue clicking Install for the other drivers, but you might find that the audio driver doesn’t have an executable file. To install the two audio drivers, just right-click on the file that says Setup information and click on Install.
After everything has been installed, now you can restart your Steam Deck. If things don’t go smoothly, you can refer to the section below to find out what your issue might be and the solution to that issue.